How to make a bulletproof plate?
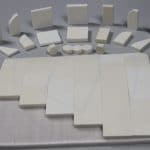
The bulletproof plate is part of the high protection of body armor required to meet NIJ standard level III or IV. It means required to against rifle or high power bullets like 7.62x51mm NATO ball, 7.62x39mm AK47 MSC, 5.56x45mm SS109, .30 M2 AP, or similar. The soft armor vest always designed for handguns so, it required the bulletproof plate together. The bulletproof plate is rigid with the single or multi-curve. It calls a hard armor panel (HAP) or SAPI or ESAPI. And it always uses two pieces per body armor at the front and back to protect major organs of the body. To make one bulletproof plate, required to follow steps and it also suitable for making a bulletproof shield or armored vehicle panel. Step 1: Choose structure of bulletproof plate Regular has two structures of the bulletproof plate in the market today. One is pure PE and another is with ceramics. That has steel plate before but not use too much today because of too heavy. Pure PE only suitable for NIJ level III, III+ or RF1 up to RF2 plate The ceramic plate can use for all protect levels including level III up to IV / RF3 Step 2: Choose ceramic if required That has three types of ceramic canbe use in market today. >99% Alumina Oxide (Al2O3) Ceramic: weight ~3.9kg/mm, cheaper but heavy >85% Silicon Carbide (SiC) Ceramic: weight ~3.2kg/mm, competitive >85% Boron Carbide (B4C) Ceramic: weight ~2.2kg/mm, lightweight but expensive Alumina Oxide is a very low-cost solution today but silicon carbide is more welcome because of its lightweight. Boron carbide will be more use in future but its cost too high today. And for the ceramic, that has hexagon tiles, square tiles, or monolithic to choose from in the market. It is depending on the cost

